Navigation

Recipes

inspired by kirakiraru, these are official recipes from kira kira pretty cure a la mode, translated into english. recipes that are higher in difficulty may also contain my own notes/suggested reference material, highlighted at the beginning.
all measurements are in metric (but i might add imperial conversions at a later date.)

difficulty key:
easy ★
medium ★★
hard ★★★
very hard ★★★+

currently in progress:
  • lion ice cream


★ personal notes ★
i'm not exactly sure why they call for a wooden spoon/spatula specifically to mix the choux pastry dough in steps 4, 5 and 6? maybe it's easier to use or something, but when i made this i just used the rubber spatula from the steps before and it worked just fine.
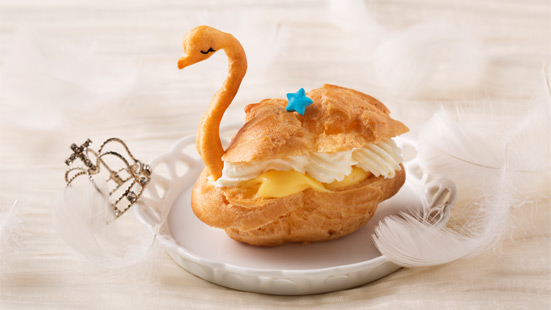

click on the above image for the original recipe!

Ingredients (makes 12)

Choux Pastry

  • 40g unsalted butter
  • 100mL water
  • A pinch of salt
  • 60g flour (A)
  • 2 medium-size eggs, beaten

Custard Cream

  • 2 medium-size egg yolks
  • 50g caster/white sugar (B)
  • 20g flour (B)
  • 200mL milk
  • A little vanilla extract

Decoration

  • 150mL fresh cream
  • 2 teaspoons white sugar (C)
  • 2 chocolate pens (one blue, one chocolate)

Preparation

Bring the choux pastry eggs to room temperature. Sift both (A) and (B) portions of flour. Preheat the oven to 200℃. Line baking sheets with non-stick baking parchment.


Steps

1. Cut the butter into 1cm cubes, then add to a saucepan with water and salt over medium heat.
★ Ichika's Advice ★
Be sure to cut the butter into small pieces, because if the water evaporates before the butter has completely melted, the moisture content will change!

2.When (1) comes to a boil, add the flour (A) all at once and immediately turn off the heat. Mix using a rubber spatula, making sure you scrape the bottom of the pan.

3. When it's all combined, heat it over medium heat again and mix well. As soon as a thin film forms over the bottom of the pan, turn off the heat.

4. Transfer (3) to a bowl and add half of the beaten egg. Using a wooden spoon, make a cutting motion to combine everything together.

5. Continue to mix, adding the remaining egg a little at a time.
★ Ichika's Advice ★
If you add too much egg, the dough will become runny. You can't remove egg if you've added too much, so be careful to add it little by little!

6. Scoop a generous amount of dough with the wooden spoon, and let it run off. The batter is OK when it forms a triangle of about 10cm, hanging from the spoon.

7. Transfer the dough to a pastry bag, then cut a small opening at the tip. Squeeze onto the baking sheet in an inverted S-shape. The start of the line will be the head, so it should have more dough.

8. Stick the tip of the piping bag into the head, then pull back to stretch the dough and create the beak.

9. Repeat steps 7-8 until you have about 14 pieces.
★ Ichika's Advice ★
I'll use 12, but since they tend to break easily, I'll make some extras!

10. Transfer the remaining dough to another piping bag, with a 1cm diameter round tip. Squeeze out 12 pieces of dough in a drop shape on a different lined baking sheet.

11. Add a line of dough on top of (10).

12. Add texture to the top of the batter (11) using a wet fork.

13. Spray liberally with water from about 30cm away, then bake in a preheated oven at 200℃ for 20 minutes, then lower the temperature to 180℃ and bake for 10 to 15 minutes. Do not open the oven door until it is baked.

14. Bake the neck pieces (9) at 180℃ for 10 to 15 minutes.

15. Let the baked choux pastry cool on a cooling rack.

16. Make the custard cream. Add the egg yolks and sugar (B) to a bowl and whisk until the mixture becomes white.

17. Add flour (B) to (16) and mix briefly.

18. Add the milk to a saucepan and heat over medium heat until it starts to bubble.

19. While stirring, add (18) to (17) a little at a time.
★ Ichika's Advice ★
Be careful not to add it all at once, or the yolk will scramble!

20. Strain the mixture with a mesh strainer and return it to the pan. Stir with a rubber spatula over medium heat.

21. When it thickens, reduce the heat to low and continue to stir until there are no lumps and the mixture is smooth. It's done when the whole mixture becomes glossy.

22. Turn off the heat, add vanilla extract, then transfer to a container and cover the surface with plastic wrap. Place the container in an ice bath to cool down, then refrigerate.
★ Ichika's Advice ★
Be sure to stick the plastic wrap on tightly! Not only will it stop it from drying out, but it'll also keep moisture from building up!

23. Before using the chilled custard, transfer it to a bowl and stir to make it smooth, then transfer to a piping bag fitted with a star tip.

24. In a separate bowl, whisk the cream and sugar together until it forms stiff peaks. Then, transfer to a piping bag fitted with a star tip.

25. Cut the top 1/3 of the (15) choux pastry.

26. Squeeze the custard cream into the bottom part of the choux pastry, then layer the whipped cream on top.

27. Place the choux pastry on top.

28. Warm up the chocolate pen, cut the tip and draw the eyes on the neck part. Let it set, and then put it in (27).

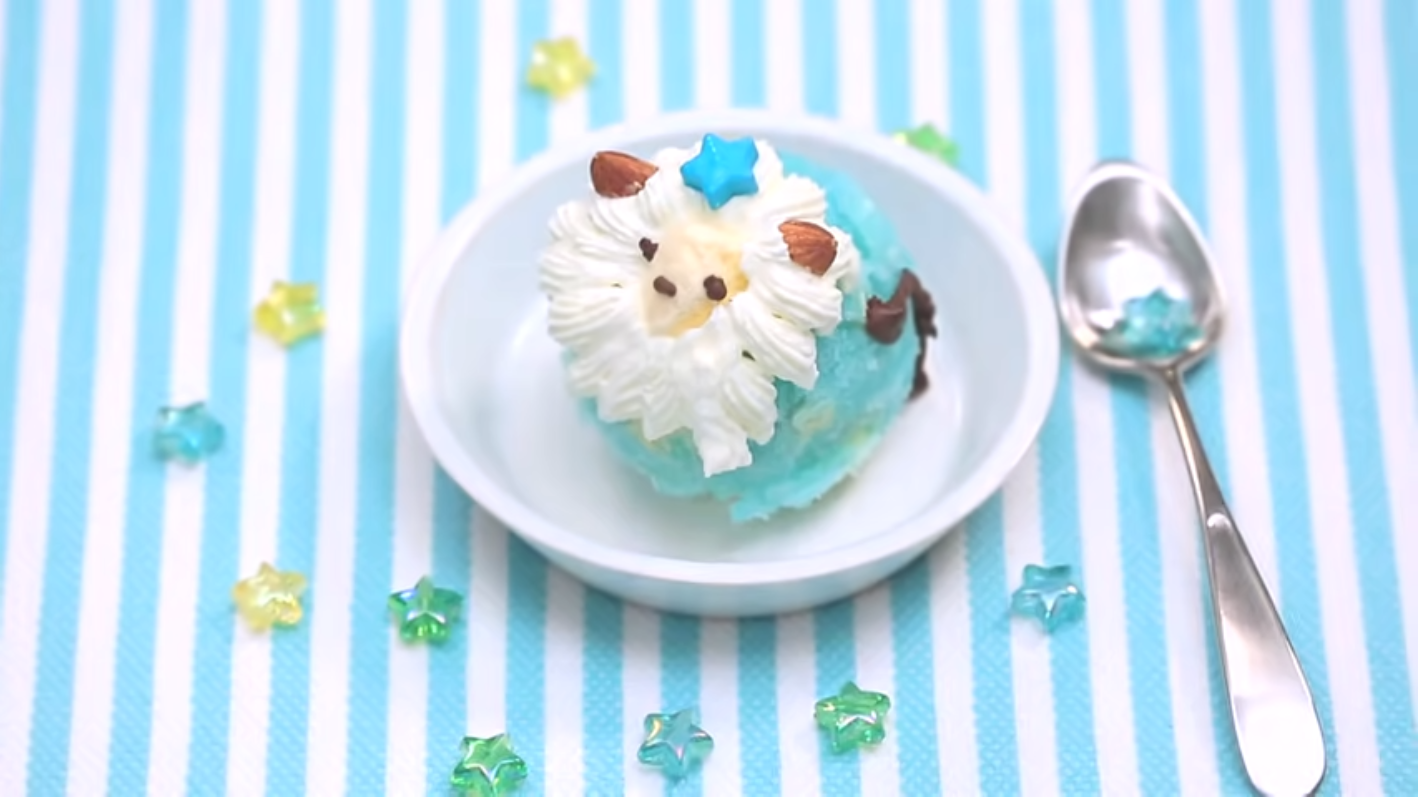

click on the above image for the original recipe!

working on it!!! sorry!!!!!


★ personal notes ★
might just be my terrible reading ability, but i don't think the original recipe mentions at any point that you also need to prepare a roasting or brownie tray in addition to your pudding molds. this particular step is called a bain-marie!


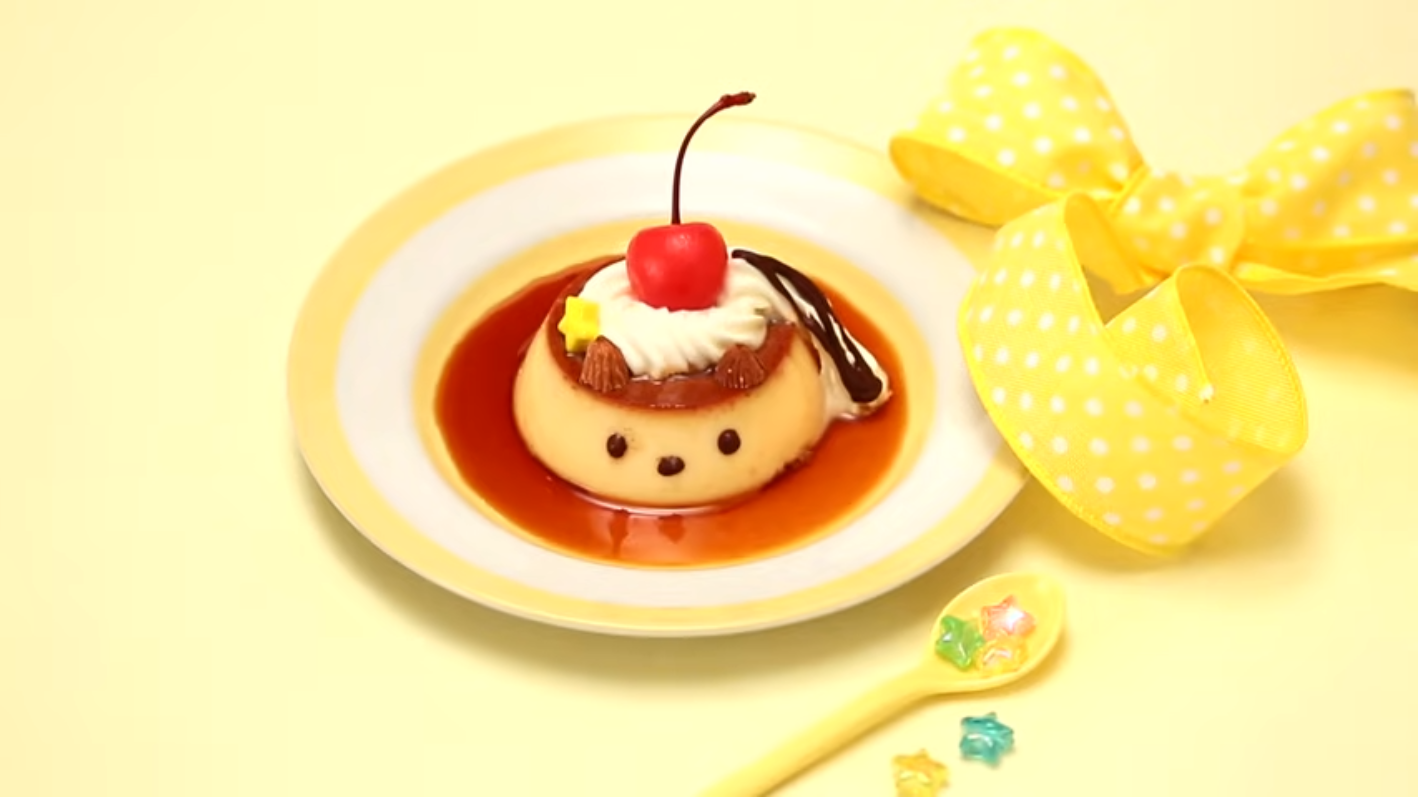
click on the above image for the original recipe!

Ingredients (makes 5, assuming 120mL capacity molds)

Pudding

  • 3 medium-size eggs
  • 350mL milk
  • 80g caster/white sugar (B)
  • A little vanilla extract

Caramel Sauce

  • 60g caster/white sugar (A)
  • 2 teaspoons water
  • 20mL boiling water

Decoration

  • 100mL fresh cream
  • 1 teaspoon caster/white sugar (C)
  • 6 cherries (canned)
  • 12 almonds

Preparation

Before making the caramel, coat the pudding molds with a thin layer of butter. The butter will help the pudding come out easily later!


Steps

1. Heat the sugar (A) and water in a saucepan over medium heat.
★ Ichika's Advice ★
The key is not to stir the mixture until all the sugar has dissolved and the mixture has become a light brown color. If you do, the sugar will crystallize and become lumpy!

2. When all the sugar is dissolved and the mixture has started to turn a light color, reduce the heat a little and gently move the pan around to ensure even heating.

3. When the the mixture becomes fragrant, the color darkens, and you see a bit of smoke, turn off the heat and add the hot water.
★ Ichika's Advice ★
Be careful not to burn yourself on the rising steam! You can pour the hot water from a container with a handle to make it safer.

4. Mix quickly, then evenly pour the caramel mixture into the pudding molds. Leave to cool, or place in the refrigerator until the pudding mixture is ready.
★ Ichika's Advice ★
If the caramel is still warm when you add the pudding mixture, it will mix together.

5. Beat the eggs. ★ Ichika's Advice ★
The key is to whisk the eggs with a cutting motion, so you don't introduce air! If the eggs foam up, the pudding won't be smooth.

6. In a small saucepan, heat the milk and sugar (B) and mix gently. Heat until bubbles start to form along the edges of the pan.

7. Add (6) to (7) and mix. Add the vanilla extract.

8. Strain the mixture through a mesh strainer. Pour the strained pudding mixture into the pudding molds. ★ Ichika's Advice ★ Straining the mixture will make it smoother. Moving the molds after the pouring the mixture tends to spill it, so place the molds onto your baking tray first!

9. Place the baking tray into a 160℃ oven. Add boiling water to the tray until it covers about 3cm of the bottom of the pudding molds. Bake for 45-50 minutes.
★ Ichika's Advice ★
It's dangerous to move the tray after it's been filled with hot water, so placing it in the oven first makes it safer!

10. Remove the puddings from the oven. Cover them with plastic wrap and chill in the refrigerator for around 5 hours.

11. Remove the pudding from the mold. Gently press down on the pudding's surface along the edge in a circle. This helps air form a gap between the pudding and the mold.
★ Ichika's Advice ★
If it's hard to remove, run a knife or bamboo skewer along the edge of the mold!

12. Place a plate on top of the pudding mold and hold firmly with both hands. Flip both over so that the pudding mold is now upside-down on top of the plate, then shake the mold gently and slowly lift it up to release the pudding.

13. Set a bowl in ice water, then add cream and sugar (C). Whisk until the cream forms soft peaks.

14. Transfer the whipped cream (13) to a piping bag fitted with a star tip. Pipe a line along the side of the pudding for the tail, and a swirl on the top of the pudding.

15. Warm up the chocolate pen, cut the tip, and draw the eyes, nose, and tail.
★ Ichika's Advice ★
If the chocolate doesn't want to stick to the pudding when you draw, gently press a paper towel to the pudding surface to soak up any excess moisture!

16. Top with two almonds for ears and a cherry on top of the cream.


Key Point: You can use store-bought pudding and start decorating from step (15).


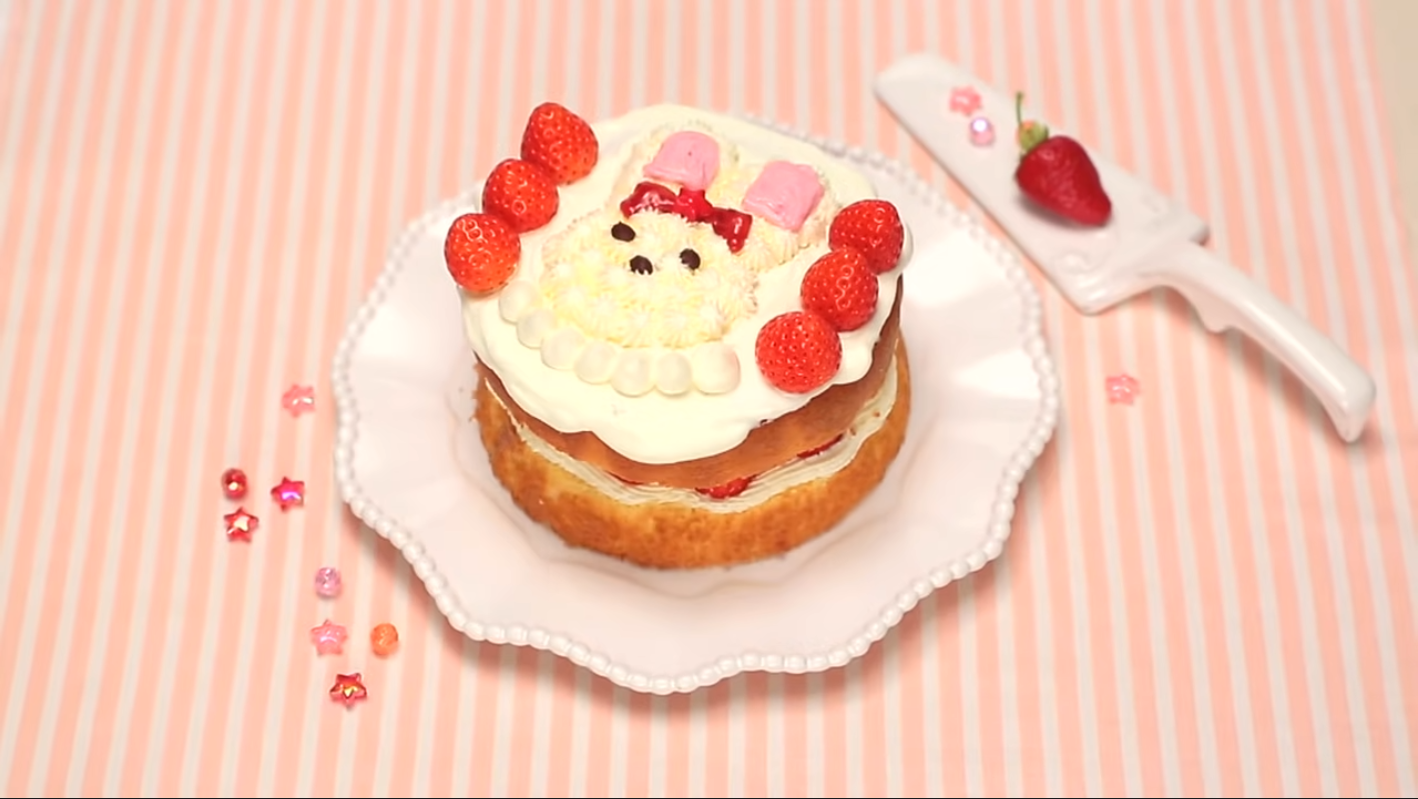
click on the above image for the original recipe!

Ingredients (makes 1 15cm diameter cake)

Sponge Cake

  • 2 medium-size eggs
  • 60g caster/white sugar
  • 2 teaspoons milk
  • 60g flour
  • 20g melted unsalted butter (melt in a microwave or with a double boiler)

Decoration

  • 200mL fresh cream
  • 1 1/2 teaspoons caster/white sugar
  • 1 pack (approx. 300g) strawberries
  • 2 chocolate pens (one pink, one chocolate)
  • Your favorite kind of jam

Preparation

Bring the eggs to room temperature. Sift the flour. Line a round cake pan with non-stick baking parchment and preheat the oven to 170℃.


Steps

1. In a bowl, add eggs and sugar and mix gently with a hand mixer.

2. Add water to a frying pan and heat to about 50℃ (when small bubbles start to appear), then place the bowl in the water bath and beat with a hand mixer. When the mixture reaches about 36℃, remove it from the water bath.
★ Ichika's Advice ★
The key is to warm the mixture in the water bath! If the temperature of the water bath is too high, the mixture will scramble, so be careful!

3. Whisk (2) vigorously by hand until it forms ribbons when it falls from the whisk.

4. Add milk to (3) and combine. Add half of the flour and mix with a rubber spatula until no flour is visible.
★ Ichika's Advice ★
I tend to get excited and mix too much, but don't overmix it!

5. Add the remaining flour and mix thoroughly with a rubber spatula, taking care to scrape the bottom of the bowl.

6. Carefully add the melted butter to (5) and mix well.

7. Pour the batter into the cake pan. Lift the pan up 10 to 20cm, then gently drop it to release any air bubbles.

8. Bake at 170℃ for 20 to 25 minutes. The cake is done when it is bouncy in the center. Cool the cake upside-down on a cooling rack with the baking parchment still attached.
(To store, wrap the cake tightly with plastic wrap with the baking parchment still attached, and refrigerate.)

9. Remove the baking parchment from the sponge cake and cut it in half horizontally.
★ Ichika's Advice ★
You can use toothpicks as guides to make it easier to cut straight!

10. Add fresh cream and sugar to a bowl. Set the bottom of the bowl in an ice bath and whisk until it forms very soft peaks. Set aside 1/3 of the whipped cream to put in the refrigerator.

11. Whisk the remaining cream until it forms stiff peaks. Transfer to a piping bag fitted with a star tip.

12. Place the first sponge cake on a plate and pipe the cream on top.

13. Arrange the strawberries on top of (12). If the strawberries are big, cut them in half or thinly slice them.

14. Add more cream on top of the strawberries, then place the second layer of cake on top. Do not use all of the cream, because it will be needed for decorating. Store the remaining cream in the refrigerator.

15. Spread the refrigerated cream from earlier (10) over the surface of the cake. Use a rubber spatula to smooth it out.

16. Pipe the remaining (14) cream on top in a rabbit shape.
★ Ichika's Advice ★
If you use a bamboo skewer to draw a rabbit shape on the cake beforehand, it will look better!

17. Warm up the chocolate pens in hot water, cut off the tip and draw the ears with pink and the eyes and nose with chocolate.

18. Make a cornet and fill it with jam. Cut a small opening at the tip and draw a ribbon.

19. Decorate with more whipped cream, then top with strawberries.


Key Point: You can use a store-bought sponge cake and start decorating from step (9).